Garage Floors (Epoxy & Coatings)
Transform your garage floor into a durable, easy-to-clean surface that resists stains, chemicals, and heavy use.
Why Your Garage Floor Deserves an Epoxy Coating
Your garage floor takes a beating. Cars drive over it every day, tools drop on it, oil and chemicals spill on it, and it still needs to look clean and professional. Plain concrete absorbs stains, cracks over time, and creates dust that gets tracked into your home. An epoxy coating solves all of these problems by creating a hard, protective layer that seals and strengthens your concrete.
Epoxy is a two-part resin that bonds directly to concrete. Once applied and cured, it creates a surface that is stronger than the concrete itself. This coating resists oil, gasoline, antifreeze, and most household chemicals. Spills wipe up easily instead of soaking in, and the smooth surface prevents dust from forming.
In Florida, where humidity can cause concrete to sweat and attract moisture, epoxy provides a moisture barrier that keeps your garage dry. It also makes your garage brighter by reflecting light, which means you do not need as much artificial lighting during the day. The result is a garage that looks more like a finished room and less like a concrete box.
Whether you use your garage for parking, as a workshop, or as extra storage space, professional epoxy coating makes the floor easier to maintain and more durable. It is one of the most cost-effective upgrades you can make to your home.
Different Types of Garage Floor Coatings We Install
Not all garage floor coatings are created equal. Some are designed for light residential use, while others can handle heavy machinery and constant traffic. Here are the most popular coating options we install for homeowners in Land O Lakes:
- •Standard epoxy coating: This is the most common choice for residential garages. It provides excellent durability, chemical resistance, and a clean, glossy finish.
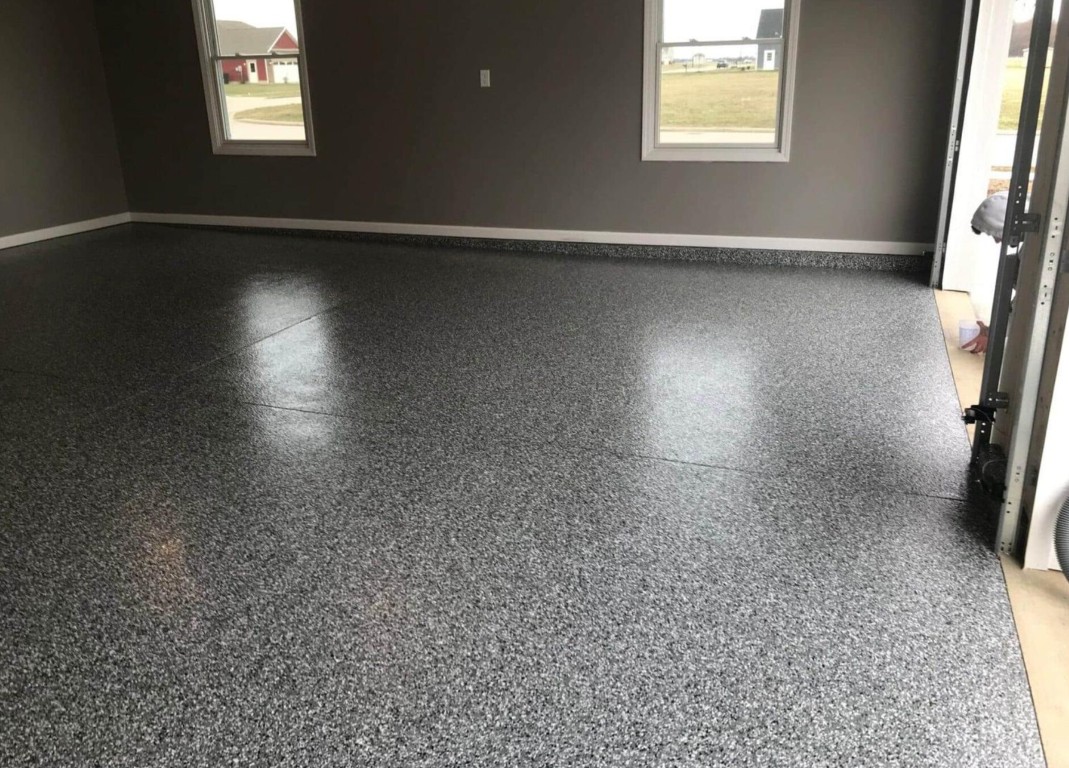
- •Flake or chip epoxy: We broadcast decorative flakes into the wet epoxy to create a multi-colored, textured surface. This hides imperfections and adds slip resistance.
- •Metallic epoxy: For a high-end look, metallic pigments create swirling patterns that resemble marble or granite. Each floor is unique.
- •Polyaspartic coating: This is a faster-curing alternative to epoxy that can be applied and ready to use in 24 hours. It also resists yellowing from UV exposure.
- •Polyurea coating: The most durable option, polyurea is flexible, impact-resistant, and can handle extreme temperatures. It is ideal for garages with heavy equipment or constant use.
The coating you choose depends on your budget, how you use your garage, and the look you want. Standard epoxy is affordable and works great for most homes. If you want something more decorative or need faster curing, we can recommend other options that fit your needs.
We also offer topcoat sealers that add an extra layer of protection and make the surface even more resistant to scratches and chemicals. This is especially useful if you work on cars, use power tools, or store heavy items in your garage.
How We Apply Your Garage Floor Coating
Applying an epoxy coating is not as simple as painting a wall. The concrete has to be properly prepared, and the coating needs to be applied in the right conditions to bond correctly. Here is how we handle every garage floor project to make sure you get a long-lasting, professional finish.
Step 1: Surface Inspection and Repair
We start by inspecting your garage floor for cracks, oil stains, and other damage. Any cracks need to be filled, and oil stains must be removed before we can apply the coating. If your floor has major damage, we may recommend repairing or resurfacing it first. Epoxy only works well when applied to a clean, solid surface.
Step 2: Grinding and Cleaning
Next, we grind the concrete to open up the pores and create a rough surface that the epoxy can bond to. This step also removes any existing sealers, paint, or contaminants. After grinding, we vacuum and clean the floor thoroughly to remove all dust and debris. The floor has to be completely clean and dry before we apply the coating.
Step 3: Applying the Primer
We apply a primer coat that helps the epoxy bond to the concrete. This primer soaks into the surface and creates a strong foundation for the topcoat. The primer also seals any remaining moisture in the concrete, which prevents bubbling or peeling later.
Step 4: Applying the Epoxy Coating
Once the primer has cured, we mix and apply the epoxy coating. We work quickly because epoxy has a limited working time before it starts to harden. If you chose a flake or metallic finish, we add those elements while the epoxy is still wet. The coating is rolled or squeegeed to create an even, smooth surface.
Step 5: Topcoat and Curing
After the base coat has cured, we apply a clear topcoat that adds gloss and extra protection. This topcoat also makes the floor easier to clean and more resistant to scratches. The entire coating system needs several days to fully cure before you can park your car or place heavy items on it. We let you know exactly when your floor is ready to use.
The result is a garage floor that looks showroom-quality and performs like a professional workspace. You get a surface that is easy to sweep, mop, and maintain, with no more stains or dust.
If you want to upgrade your garage, professional floor coating services are the way to go. A coated floor makes your garage more functional and adds value to your home.
Frequently Asked Questions About Garage Floor Coatings
Ready to Transform Your Garage Floor?
Get a durable, professional garage floor coating from experienced concrete contractors in Land O Lakes. Free estimates available.
Call (813) 535-8615